I want to SCREAM because I’m trying to print yarn labels and my printer will print test pages just fine but prints my labels with 75% of the image missing. I’ve tried reinstalling my printer and everything else I can think of. WHEN DID I STOP BEING TECH SAVVY pic.twitter.com/6EhjhNrqSb— Lucy Mason (@LucyMason217) March 28, 2021,
Ownership of a printer comes with the responsibility of maintaining it and sustaining its functional state for a long time. If your HP printhead is not cooperating in printing more projects, your printer might be running into quality issues; that’s why you should know how to clean printer heads at home.
Sometimes you may face issues like, your printer printing lines, missing prints, etc. Well, a dirty HP print head can be the culprit behind it.
However, it is possible to test your printer head without actually touching it. Besides this, it is very important to address these printer head cleaning concerns because if they are left unaddressed, it might lead to completely damaging the systems.
Keep reading and implement easier measures to get rid of the clogging issues on your printing device, and try some DIY printhead cleaning solutions mentioned below.
What is a Printhead & Where can you Find it?
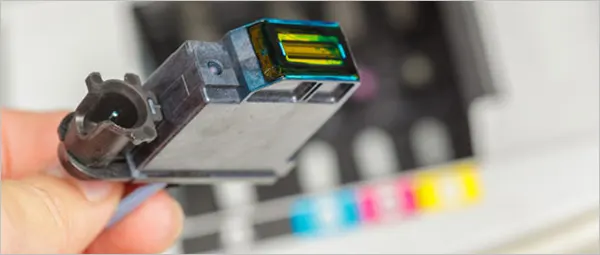
It is a component of a printer that plays an essential role in holding the characters and acting as a medium to get them inked on the printing platform.
These are aligned with the print head assembly for holding the ink cartridges to spray the ink on the paper via its back-and-forth movement. All this is controlled by a belt and an internal stabilizer present there.
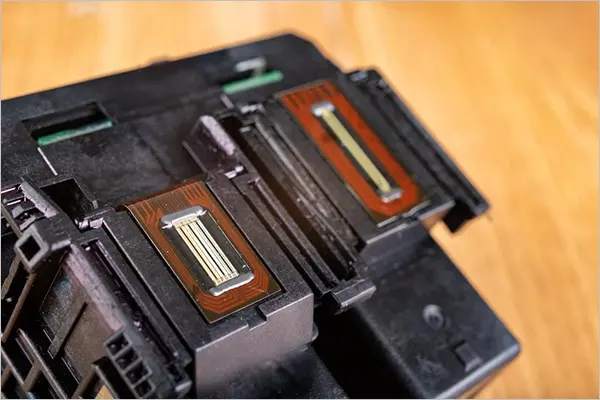
The dust, dried ink, or debris often gets deposited on it, making the print jobs appear streaky, white, or improper. This problem frequently gets worse with some specific printers, which get more clogged than others.
What Are the Three Types of Printer Clogs?
It often happens that the dust, debris, and dried ink dry up and settle into the tiny holes that cause the prints to appear streaky and unclear. However, the problems become more frustrating when the premium ink clogs more than the standard ones.
- Simple Clog
These are clogs that have extremely tiny, microscopic holes that emit droplets of colored ink. The ink inside the printer dries up quite often if it is not used regularly. The air bubbles can cause blockages. However, such clogs can be quickly removed by running a regular cleaning procedure. But, if not taken care of properly, these can turn into more tough ones.
- Stubborn Clog
Sometimes, simple methods are not useful enough to clean the clogged pores, raising the necessity of physically cleaning them. Warm water can be used to loosen the ink that has dried up there. Besides this, ammonia-based solvents are also found to be very useful for providing deeper cleaning.
If you’re about to clean printheads, make sure you remove all the cartridges and wrap them in plastic to avoid drying them out. Otherwise, you can also use a damp towel with warm water or a solvent for a thorough cleaning by moving the printheads back and forth. Following the process, 3–4 times will ensure proper cleansing. In the end, do not forget to run a print test to assess its functionality. Not to mention, make sure to create a good printing head cleaning solution as it is needed.
- More Stubborn Clog /Serious Printhead Clogs
The extra-pigmented ink can also be a serious concern. You have to keep check of the ink levels on your printer, as these tend to dry faster than standard ink, which accelerates clogging. Start by removing the printhead assembly from the printer to begin the cleansing process.
During the printer head cleaning, you may need to keep printer heads in the cleaning solution for several hours to remove dirt & dust that has accumulated, which is a much cheaper method than replacing them.
To prevent getting such stubborn clogs, it’s important to follow a regular routine to clean the printer! Read our section on how to clean printer heads to know the full process.
When Should I Clean Printheads?
Your printer can become dirty if it sits idle. That’s why it is suggested to perform at least a few print jobs every month to maintain the quality and avoid drying up the ink and leading to cartridge error issues. However, printhead problems persist even if you are following routine tasks with the right printing head cleaning solution.
You can tell that your printer demands cleaning when your cartridge is full and your printer is not providing you with quality work.
Why Follow Up a Regular Maintenance Routine?
Just like you should not drive a car more than 50,000 miles, it is important to maintain a printer regularly as well. The one thing that you can follow for the smooth operation of the printer is regular cleaning; without these, you may have to face printer not printing errors.
Although, smart printers at present are so intelligent to sense early signs and set the printer into auto-maintenance mode.
In addition to this, you should keep an eye on the signs to see when they might need to be cleaned. These include white streaks at prints, partial or incomplete print jobs, etc. These signs are alerts to enforce some additional steps to restore the proper functioning of the printer.
What to do Before You Clean Your Printer?
Before you jump into cleaning your printer, make sure you are actually using the same cartridges with the same label as your printer. For example, HP cartridges are designed for the HP printer to maximize their efficiency. Evaluate whether they are the best pick for your system’s setup or not.
In case you identify that the cartridge is damaged, has exploded in the past, or doesn’t fit into it, proceed to replace it, as it can lead to numerous issues like printer paper jam, so take care of it when you see it.
Insert the new one and initiate the automated maintenance tasks. Once it is done, begin with your printing tasks again.
How to Clean Your Printer’s Print Heads Quickly?
There are various methods available for printer owners to clean their printers. Firstly, let’s hop into the crisp approach to cleaning it.
- 1. Begin with an auto-clean: The automatic cleansing cycle is integrated into advanced printers. Jump to the “Printer” application and “Clean printhead” option. Wait for some time to allow the cleaning process to complete.
- 2. Unplug it from the power source: To prevent yourself from electrocution, allowing you to move the printer parts with ease. In addition to this, it is also important to ensure your safety while doing so.
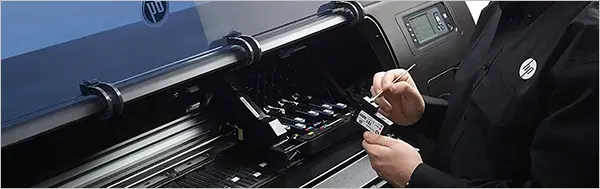
- 3. Open printer, remove, & clean your ink cartridges: Open the cover of your printer; in case you don’t know how to do it, refer to the manual. In circumstances the manual isn’t available, refer to an online manual for the same.
Follow up by carefully removing ink cartridges and cleansing that point of contact with a soft cloth and the printing head cleaning solution. Also, put them back after cleaning in the same order and in the same way.
- 4. Plug the printer back into the power source: Once cleaning is done, close its cover and put it back in place. Initiate the automatic start-up process and let it finish on its own.
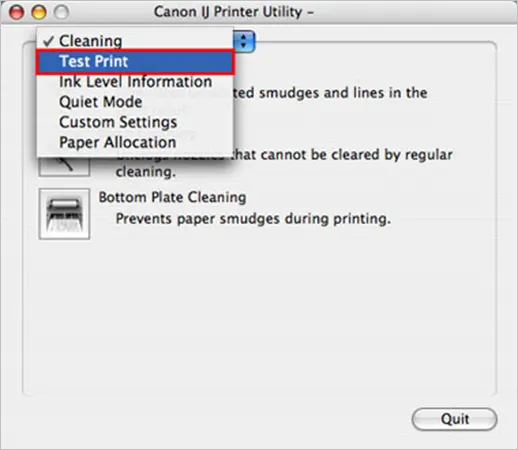
- 5. Follow up with a printing test: Once your printer is started, it’s time to kick-start a printing test to evaluate it. Proceed with a test print to look for any other signs required to clean more.
- 6. Repeat the steps if printing is not up to the mark: In case, after running a test print, you find that further cleanliness is required, then you might need to clean them again. Repeat the steps as explained in the above steps if your printer fails the print test. Re-take the test after cleansing it again.
Note: If the printer is still not able to pass the print test, look for a replacement cartridge. This may restore the printing capabilities of your printer. However, in case it doesn’t work, choose to refer to a professional to assist you with this specifically.
Various Methods to Apply for Cleaning the Printheads
How to clean printer heads? Well, the answer to this is in the methods explained below:
Paper-Towel Method
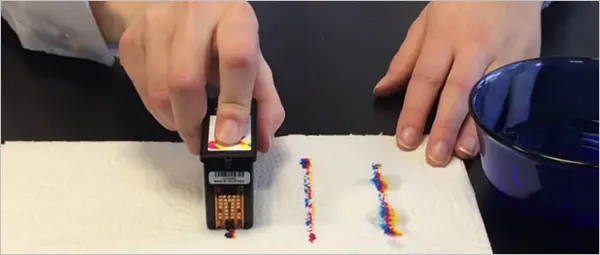
It is especially applicable for those who want to clean ink cartridges having integrated printheads. To proceed following this, you would need to have a damp and a dry paper towel and follow the steps:
- With a damp paper towel, blot the cartridge from the printhead side on it. It must be located at the end. Tap it a few times and slide down to see the three lines there.
- You will be able to see the ink on the damp paper towel.
- Now hold your cartridge toward the dry paper towel for at least 30 seconds.
- Once it is done, slide it onto the machine and run the test print to evaluate it better.
- If the test is clear, it’s great; if not, repeat the method and test again.
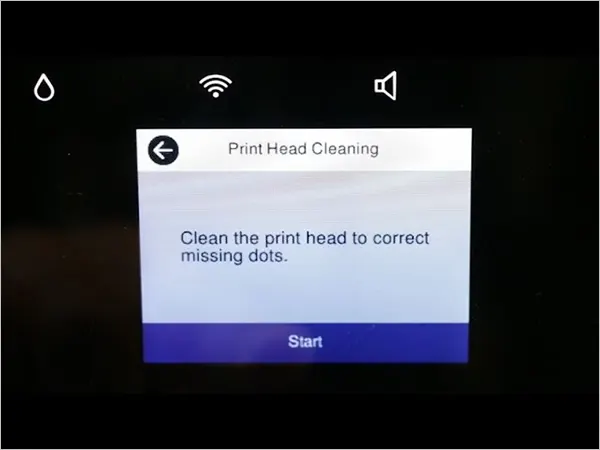
Initiate Cleaning Process with the Printer’s Display Screen
The common reasons for clogged printheads are microscopic dust particles, dried ink, or air bubbles. When you run a printhead cleaning process, it will clean the nozzles from the dried-up inks. Initiate the procedure that is built into the printer’s software.
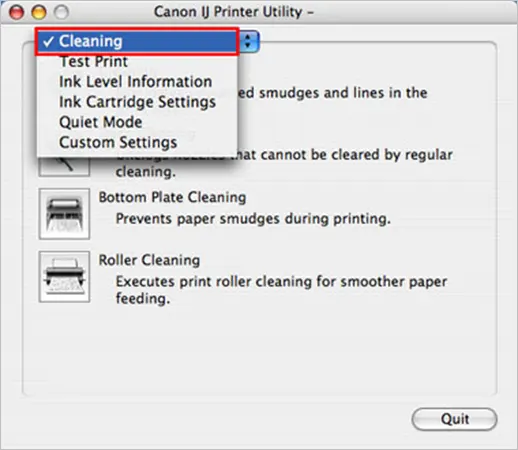
Now, once it is completed, try to print the test, and if it is not done, do it again. Make sure the second time you run the test shows accurate results. When it’s done, you can start using the printer normally.
Signs to Identify Before Jumping for a Replacement
When everything fails to give you the results you are expecting to fix the functional state of your printer, it’s time to change it. Look for these identifiable signs and symptoms that are explained here.
- Cleaning is useless: If you have implemented all the possible methods to clean the printheads and still fail to achieve any results, you must replace them.
- Display screen suggests you replace it: Sometimes, in advanced printers, the display screen flashes a notification suggesting you replace your printheads. Follow up with it.
- Streaks or bands while printing: If your printer is consistently in use, you can see there are missing prints, streaks, or bands, signaling you to replace them.
These were the signs you must look for to finalize your decision for replacement…..
Final Say
If you find that the printer is still not working properly even after running all possible cleaning methods, it’s time to connect to an expert. If you’re lucky, you can use services like HP Support Assistant, or you can just contact an expert. They will help you to follow the right approach to keep your printer well-maintained for a longer time and avoid encountering such problems in the future.
In addition to this, it is necessary to ensure that you don’t use any harsh chemicals for cleaning them. It is because despite having the intention to reset the device to its adequate functioning, it can lead to damaging the printer’s components as a whole.
Hope you loved re-establishing your printer’s functionality!
FAQs
Ans: The ink droplets are the culprits to make the printheads clogged. This blockage at the nozzles makes it difficult for the ink to pass through them. It eventually dries, stacking the stuff and completely closing the opening.
Ans: The incomplete nozzle patterns are evidence that the printheads have been clogged. However, it is advised to follow the regular cleaning process as per the manual or wash it with the right chemicals.
Ans: The general chemicals that people might think can be useful for cleansing are; water, ammonia, isopropyl alcohol, acetone, etc. Among these, one must surely avoid normal water.
Ans: Make sure you have already completed 4–5 rounds of cleansing. Dry them and double-check the nozzles to make sure they are not clogged anymore. Ensure that you do not have worn-out stuff if it is to replace them.
Ans: Of course, it is possible to have printer hardware problems. These include:
- Improperly Plugged Power Cord
- Running Out of RAM Memory
- The Slower Speed of the Printer:
Ans: If you have successfully executed every method that is described above, it is quite possible your printer is on its last legs. Hence, it is important to replace the stuff rather than repair it. You can choose to purchase a new option offering the best deals.
Ans: You can fix that error by;
- Reset the cartridge counter.
- Go for disabling those low-ink messages.
- Launch the print application from your printer.
- Disable such notifications to avoid getting such warnings.
Sources:
Also Read: