“Why are there lines in my printing?” You must have asked yourself, haven’t you?
It feels annoying to see your printer skipping lines while sometimes printing undesirable lines completely. You may intensify your frustration here from being unable to find the root cause.
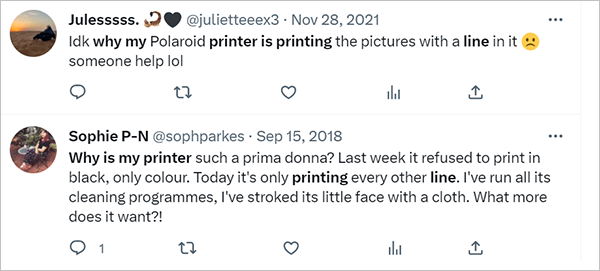
The above tweets show how clueless people are about the lines in printing and can’t help themselves to get out of it. If such happens to you too, then firstly, congrats on being at the right place.
Get ready because I will let you know why your printer prints with lines and how to get rid of lines when printing.
Why Is My Printer Printing Lines?
If you are fed up with the lines on your printed paper and can’t find any clue regarding it, then the following subheads will let you know why is your printer printing lines:
Loss of Connection in Printer
The drop in internet connection from the printing device is the most common reason why your printer started printing odd lines.
Though this issue is not as prevalent today as used to be 15 or 20 years ago because of the single hardwired dependency.
Today’s printers are majorly connected via WiFi and Bluetooth. It means that wireless printers are trending today. Additionally, it’s surprising to know that you can also convert a USB printer to wireless completely.
However, many times these advanced printers lose the connection and thus you see printer printing lines on the page.
If such is the case that happens to you regularly, better check whether your internet connection is safe. Thereafter, visit a hardwired hookup to get rid of the problem.
The Problem in Translating the Print Order
Sometimes, what you want your printer to print gets lost somewhere while you are trying to translate along the line. On account of this, your printer can’t translate the matter properly and hence, it causes your printer to malfunction.
In such a situation, you often see funny symbols, weird formats, and lines that give your print a horrible appeal.
The Ink Troubles Your Printer
If you see too many lines on the final printed page, specifically in multi colors, it’s highly probable due to the toner or the ink cartridges which are stuck in your printer “under the hood”. Try checking the printer ink level and see if there’s any leakage or anything.
The main issue herein is that the “non-OEM ink” you use gets a bit “gummy” when used inside the printer heads, and it’s enough to cause malfunction finally. Since the ink will dry sooner, it becomes a major obstacle and gets scattered across the page on the printer head.
Why Is My Printer Skipping Lines?
If you find your printer lines missing on the printed paper, then the following briefly explained can be the probable reasons:
Misaligned Print Head
Aligning the printhead is a step that is frequently overlooked during installation. But if your printer is misaligned or doesn’t follow the alignment instructions well, that imposes more danger as it causes your printer to miss lines.
A Quality Set to Low
Once you set the quality of your printer to “low”, it creates a deep impact on the way your printer functions. Let’s say it will decrease the resolution of final printouts and use less ink as compared to what is required. Following this way, your printer skips lines.
Paper Thickness
Another significant reason why your printer skips lines is using the undesirable thickness of paper over the preferred one. When you don’t alter the printer settings to adjust the printing paper’s thickness, it will surely cause the machine to skip lines.
How to Get Rid of Lines When Printing?
After looking at the reasons behind printing lines on the print page, it’s time now to know how to get rid of lines when printing. The below-explained steps will make you understand the exact process.
Note:The steps mentioned here are specified to fix the error in an ink jet printer
Step 1: Run the Print Head/Cartridge for the Cleaning Process
After visiting the LCD panel of your printer, follow the guidelines as mentioned below:
- Visit Settings >> Clean print head/clean cartridge” option
- Run the option that says, “cartridge alignment” and fix the color alignment errors if any.
- Let’s say your printer doesn’t have a screen, then in such a case, take the aid of your PC. Visit its control panel and then choose “Devices & Printers”.
- After that, select “printer” >> “Printing Properties”. To find the option to clean, you can explore it here in the “services” tab.
Follow this cleaning process up to three times and you will see the improvement yourself.
Step 2: Clean Cartridges/Nozzles
If you can’t find any positive results after implementing the steps mentioned in Step 1, do as directed below:
- To confirm which color is blocked, print a test page.
- Unlock the door of the printer to eliminate the cluttered cartridge(s).
- Take a wet paper towel and use it softly to wipe out dry or blobs of ink away from either the back of the cartridge or nozzles at the bottom.
- Put the cartridge on the top of the towel. Make sure that its damp top remains in touch with the nozzle or print head until the ink gets into the cartridge a little.
- Try printing the pages by reinstalling the ink cartridges. You won’t see any lines on the printing page this time.
Step 3: Clean the Ink of the Cartridge Carriage/Print Head
In most cases, it’s very likely that the dirt also builds up in the ink cartridge holder, i.e., where you locate your print heads. Herein, you have to clean the dirt accumulated there.
Simply follow the steps mentioned below in this regard:
- Hold the cartridge holder and remove the ink cartridge away from it.
- Take some wet cotton and gently use it to wipe the inner side of the ink holder exactly at the position wherein you see the print head. Continue doing it until the ink gets cleaned completely.
- Try printing again any page after you reinstall the ink.
If you have performed all of the above steps, but no solution proved to be of any use to you, then the last resort is to replace your ink cartridge, you can also opt for remanufactured ink cartridges for the same. Either they don’t have the ink, damaged or dried up due to wear and tear.
Fixing Printing Lines on a Laser Printer
Now let’s try to understand how you can fix printing lines on a laser printer. Since it’s a different model of printer, you can observe the difference in the steps here as what we discussed above. Let’s take a look:
- If you find it successfully, then run the drum or fuser cleaning process by going to the printer’s menu. You can locate the option either in the print settings or the maintenance section.
- Run the clean process if it is available.
- After deleting the toner or drum, check for dirt or damage manually in the drum cylinder. Also, you have to ascertain that you don’t touch it.
- If you find the drum in a filthy condition, clean it using an air duster.
- Finally, install the toner or drum into the cylinder and try printing again.
Hurry, you have resolved the error. If the printing problem persists even after performing the process as prescribed above, you should replace the fuser unit of your printer. It may be contaminated with dirt which can’t be removed manually.
With time, printers have evolved tremendously. From the sole function of printing papers, multiple developers worked on their development and included a variety of advanced features in the machine.
Final Verdict
I hope that you found this article useful and got to learn something new. You won’t have to look for another source for getting answers to “Why is my printer printing lines” and “How to get rid of them”.
I have provided every useful information here regarding how you can resolve them. Having said that, it’s time to leave now, stay tuned about the upcoming articles till then.
FAQs
Ans:
- nozzle clogs
- low print quality settings
- misaligned print heads
- the incorrect thickness of paper
Ans: The straightforward solution is as follows:
- Pull out the print cartridge.
- Check if there exists any line on the drum of the print cartridge. If you find any, replace it with a new cartridge.
- Place the new cartridge in the machine.
- Try printing a new document.
Ans: The ink in the printer may have dislodged from its proper place. Alternatively, a wrong paper size may be loaded into the input tray.
Sources: