Brother Printers are amazing at their work and are capable of giving a tough competition to other available brands. However, they only work their best if you know how to connect your computer or laptop to your Brother Printer. There are different ways to connect a Brother Printer and if you are a newbie, it can be a tough job for you.
Methods to Connect Brother Printer to Computer/Laptop
Method-1 Using CD/DVD
Brother Printer comes with a CD to install the Brother Software and Drivers and if you don’t have the CD drive to insert the disk, you can connect your Brother printer to the computer wirelessly.
The following steps will help you to connect brother printer to laptop or computer using the CD/DVD:
- Begin by inserting the CD/DVD of the Brother Printer into the disk drive.
- Next, go to ‘My Computer’ on your computer or laptop.
- Double-click on the DVD Drive icon that has a CD logo.
- Next, select the model number of your Brother printer.
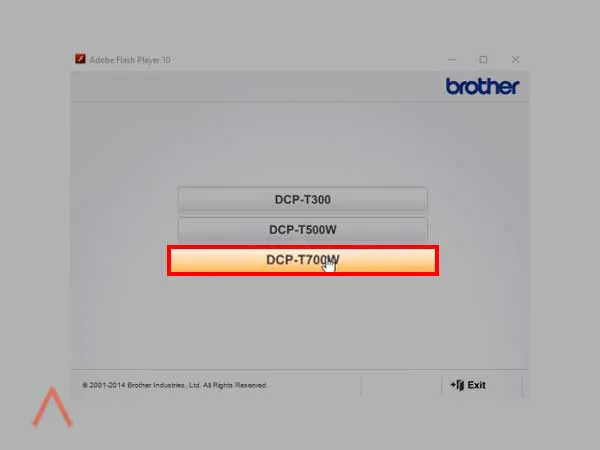
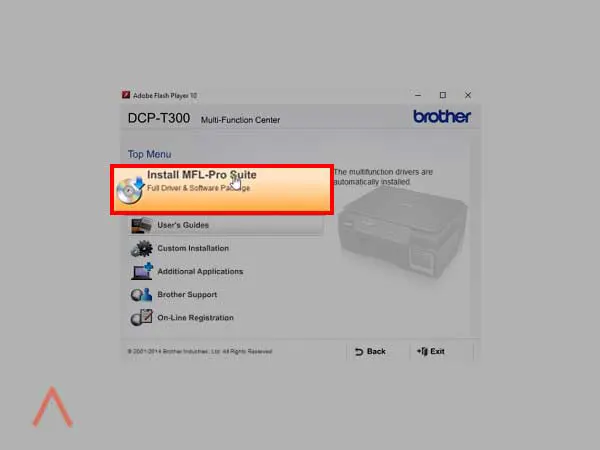
- Choose the language and then click on Install MFL-Pro Suite.
- Click ‘Yes’ to give permission to the user account controls.
- If asked ‘Do you want to check if a newer version of the software is available’, click on No > Continue.
- It will take some time to finish the setup; click on ‘Yes’ to agree to the terms and conditions.
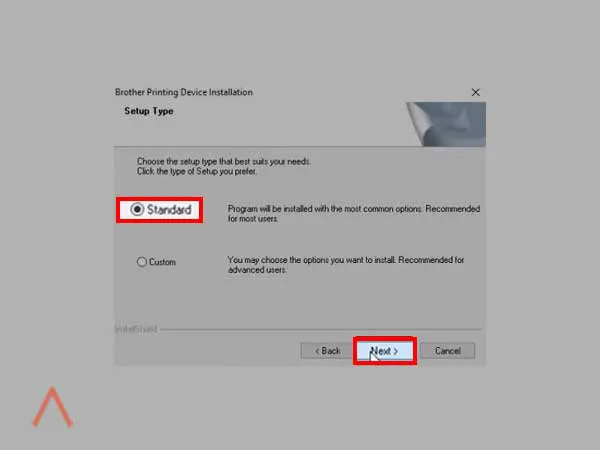
- Click on ‘Standard’ and then click on ‘Yes’.
- Restart your computer and then proceed to install the required drivers for your printer.
Method-2 Adding Manually
If you are wondering how to connect Brother Printer to Computer on Windows 10, this method is for you. Here you will add a brother printer to the computer manually. Before beginning with the procedure, ensure that you have turned on your printer and connected it to your network.
- In the Windows 10 search box, type ‘Printers and Scanners’ and click on the right option from the search results.
- Next, click on ‘Add a printer’.
- Your computer will start scanning for the available printers and you just have to follow the instructions to end the installation.
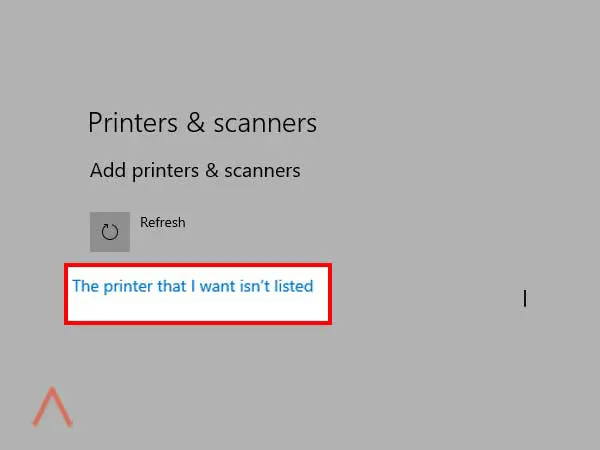
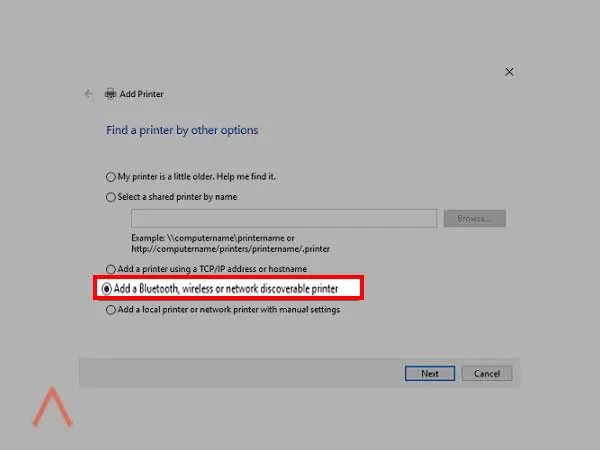
- In case, your Brother printer is not listed there, click on the option ‘The printer that I want isn’t listed’.
- Now, with the help of the USB cable, connect your printer and computer.
- Click on the option ‘Add a local printer or network printer with manual settings’ and then hit ‘Next’.
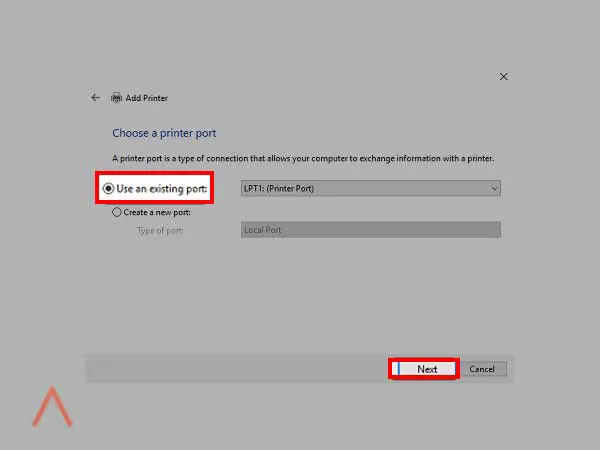
- Next, choose ‘Use an existing port’ and then click on ‘Next’.
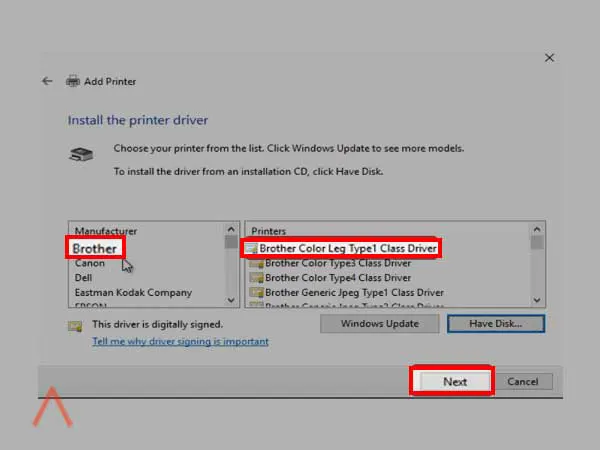
- Now, select the manufacturer from the left menu, and from the right, select the model number of your printer; press ‘Next’.
- Now you can print a test page to ensure that the Brother printer is connected properly to your computer or laptop; click ‘Finish’.
Note- Make sure to install the latest drivers for your Brother Printer model by visiting the Downloads section of the manufacturer’s site. In the absence of a printer driver, you cannot make your printer print smoothly.
Method- 3 Connect Brother Printer Wirelessly
In case, you aren’t able to connect your Brother Printer using the above two methods, you can connect them wirelessly. You can easily connect your Brother Printer wirelessly to your computer by connecting them to the same network.