Are you facing trouble while printing important documents? Ever faced a situation like this before? If yes, then let’s discuss this problem together and find out ways to fix it with the help of some troubleshooting steps that might cure the issues for questions like why is my printer not printing black, or What are the easy steps to fix HP printers in error state? raised by many of us.
There could be varied reasons for the same, such as cartridge problems, settings issues, and many others. Follow this detailed article to know how to fix these errors effortlessly.
Reasons Behind Printer Won’t Print Black
Printers are the computer peripheral devices and are classified into two categories; 2D printers and 3D printers. Printers are developed to print important documents quickly and effortlessly to assist the workflow at a much faster pace.
It feels irritating, in case we find out the printers are not printing black, doesn’t it? There could be some common reasons behind this problem that can be fixed. One needs to find out the issue, and that’s it. For further, I am here to help users to tackle this problem. The good news is that users can fix these problems on their own, and there is no need to visit customer service at the initial stage.
The reasons are
- Multiple Queues: Multiple tasks can hinder the smooth working of the printers
- Jammed Papers: There are possibilities that papers got stuck into the printers.
- Setting: Sometimes, users make changes to the settings. So, changes in settings can be a reason for printers not printing
Now let’s find out ways to fix bugs and errors for the problem of the printer won’t print black…
Solution 1: Check on Basics
Users should always check on the basics of the printer, and for that, users are required to access the printer’s user manual, which will definitely do wonders. The solution is based on the kind of printer one has. For example, if someone has a color or monochrome printer, then the solutions for both printers will be different. Let’s see how it works:
1. Perform a Full Power Cycle
The term “full power cycle” sounds fancy, right? To make this term easy to understand, a full power cycle is a process of turning “OFF” and turning the printer “ON” again.
Users are advised to disconnect the printer with all the cables. Wait for some time, reconnect the printer with cables, and then restart it again. Now see if the problem of black ink not working on the HP printer is solved or not.
2. Print Test Page
The practice of testing a page is performed to determine the performance of the printer and see if the black ink is on the page or not. Users can find this option on their printer display screen, else they can go through the step-by-step guide mentioned in the user’s manual provided with the printer at the time of purchase.
3. Check Cartridge Problems
Users should always monitor their cartridge ink levels and replace any low and empty cartridges from their printers.
4. See If the Printer is Set up Correctly.
Users should look closely at the setup of their printer, and for that, they can go through the user’s manual, where they can find out how to set up the printer. And, if the users have already set up the printer, then they can match the setup settings with the manual guide for assurance.
Solution 2: Fix Print Head Problems
The print head is the component of the computer that is responsible for transferring ink on the page. The process involves tiny droplets of Ink through different nozzles.
The nozzles are presented into the printer which creates different prints, These nozzles play a vital role. But, in case one of these nozzles got cloaked, then the print gets faded and streaky.
To clean the print head, there are two different ways, the first is to clean the print head manually and the other is to make changes to the settings of the printer. Three different methods to clean the print head are as follows:
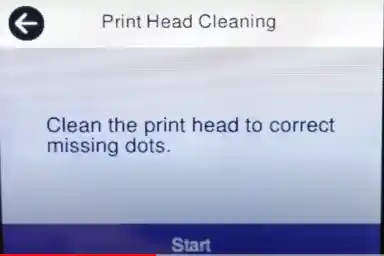
1. Automatic Print Head Cleaning
Nowadays, modern printers are coming with the pre-installed automatic print head cleaning feature that enables the user to clean the blocked nozzles from the printer’s maintenance “Menu” option. To learn how to clear the nozzles, let’s focus on the steps mentioned below-
Step 1: First, users are advised to load white papers in the Input tray.
Step 2: Now, tap on the (

Step 3: Then move further by touching the Right arrow button (
Step 4: Again touch the right arrow button (
2. Manual Print Head Cleaning
Printers use ink cartridges with an integrated print head. Users can try cleaning the print head manually by using the “paper towel” method.
The paper towel method is a quick and easiest way to clean the cloaked print head and can resolve problems like Epson printer not printing black or HP printer not printing black.
But always keep in mind that users have to clean the print head with care, otherwise, there are possibilities that one can damage the print head. So always consult documentation specific to the printer and avoid any damage.
3. Realign the Print Head
Most printers nowadays have the option of an “aligned print head” available under the maintenance menu or control panel. This option is best suited for alignment installation positions of the print, that result in improved different colors and lines.
The steps of realignment are different and usually based on the device’s brand.
- For HP printers: Start by visiting the printer LCD screen> select set-up and at last tap on “Tools”
- For Epson printers: Select set-up from the display screen> maintenance> head alignment
- For Canon printers: Navigate the cursor to the gear icon that indicates “Settings” from the display screen> maintenance> print head alignment
Solution 3: Software Problems
By following the mentioned steps, if users find out that the problem is neither with the cartridge nor with the print head, then there must be a problem with their software. Long story short, after taking all the measures for the hardware settings, let’s now look into the ways to make amendments to the software of the printers.
1. Printer Troubleshooter
Printer devices come with the feature of printer troubleshooting that basically helps to find the problem. To run the printer troubleshooter on the printer, follow the simple and quick steps noted below:
- Step 1: Press Windows + I key to open the settings.
- Step 2: Navigate the cursor to the “Update and Security” option, and then to “Troubleshoot”.
- Step 3: From the right pane, select Additional “Troubleshooters”.
- Step 4: Move further by selecting printers. Now from the pop-up that appeared on the screen and hit on the “Run The troubleshooter” button available in the bottom right corner of the pop-up.
- Step 5: Click on the “run the troubleshooter” button and follow the on-screen instructions and the fixes recommended.
2. Check on the Driver’s Settings
Drivers are the software that needs to be installed on the printers. The drivers are installed to communicate between the computers and the printers. If the driver is not already installed, users can also download and install the HP printer driver manually.
But, if the driver is installed on the printer, then uninstall the older version and then install the latest version of the printer driver.
Installation of the latest version of printer drivers is recommended because these versions come with updated features and benefits. After installing the latest version, kindly make changes to the driver’s settings, which usually indicate making changes to Paper settings. And, solve the problem if the printer won’t print black.
3. Reconfigure Printer
If the problem is still not fixed, then the only option left is to reconfigure the printer. This is done by uninstalling all the software available and setting up the printer again from scratch.
Solution 4: Cartridge Problems
Cartridges can be one of the major reasons for printers won’t print black. So methods to resolve cartridge problems are:
- Installed Correctly
It is possible that the cartridges are misaligned or installed inappropriately when removed from the printer. Double-check on the alignment and in case the cartridge is not installed properly, then remove it from the printer and install the cartridge back again.
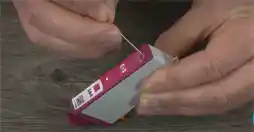
- Cartridge Vent
During installation, users can forget to remove the small piece of tape placed on the vent of the cartridge. Removing the tape from the vent allows the cartridge to print. Also, make sure that the vent is not cloaked. And if cloaked, use a needle or the pin to clean it
- Replace Cartridge
The cartridge needs to get replaced on a timely basis. Sometimes the cartridge is not empty, still, the printer won’t print black. In such cases, too, users are guided to replace the cartridge. For that, follow these steps:
- Step 1: Start by loading plain white papers into the input tray and turn on the printer.
- Step 2: Next, open the door of the cartridge and wait until the printer gets silent.
- Step 3: Press the cartridge with a light hand in order to remove the cartridge from the slot.
- Step 4: Get the new cartridge and pull the tape to remove the plastic tape.
- Step 5: Now insert the cartridge by matching the sides into the color-coded slots. Once it fits into place, make sure the icons printed on the cartridges match the icon printed on the slot.
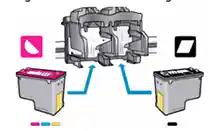
Note: Keep in mind to insert the tricolor cartridge into the slot available on the left and insert the black cartridge on the right side of the printer.
- Step 6: Repeat the same process if necessary.
- Step 7: In the end, close the cartridge door.
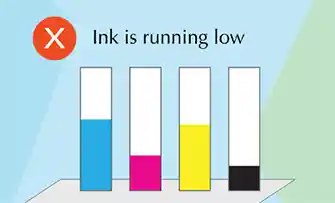
Solution 5: Check on Ink Levels
Another reason for printer won’t print black could be low ink levels. Users can optimize the ink levels and refill the ink on the cartridge if needed. For that, the steps are
- Step 1: Start by visiting the control panel available in the computer’s “Start Menu”
- Step 2: Then navigate the cursor toward the option titled “Computer & Printer” and click on it.
- Step 3: Now, right-click on the printer option and select the “Print Preferences” option. This option is available under the “devices & printers” option.
- Step 4: Now go ahead by selecting the “Repair” tab.
- Step 5: Now select the “Open Status Monitor” option under the maintenance menu.
- Step 6: Users are now able to look at the amount of ink available in the cartridge.
- Step 7: If the pane indicated low ink levels, then, kindly refill the cartridge or simply replace the cartridge.
Solution 6: Remove Long Printing Queues
Long Printing queues could raise issues like printers won’t print black. That might be because users have been given numerous printing tasks. For example, if users are enabling the command to print hundreds of documents at the same time, the printer stops printing.
To resolve this, clear all the tasks by following the noted steps:
- Step 1: Start by pressing the Windows and R key together, with the help of the keyboard.
- Step 2: Users get displayed with the “Run” box on their computer screen.
- Step 3: The run box comes with the space available, where users need to type “Services.MSc”
- Step 4: Next, hit the “Ok” button to continue.
- Step 5: After clicking on the OK button, users will be redirected to the service window.
- Step 6: From there, right-click on the “Print spooler” option and then click on the “Stop” option.

- Step 7: Now, kindly open “File Explorer” on the computer device.
- Step 8: And paste the address “C:\Windows\System32\Spool\PRINTERS” into the address bar.
- Step 9: After a few seconds, a folder will appear on the computer screen containing all the printing tasks, remove all the files present in the folder.
- Step 10: In the end, go back to the “Services” window & “start” print spooler again. That’s it, this process will definitely troubleshoot the problem.
Solution 7: Connect with the Printer Manufacturer
Like always, professionals know better. If nothing works, the users are guided to connect themselves with their printer’s manufacturer. To know about the manufacturer of the printer, get the user manual supplied with the printer at the time of purchase and go through the manual thoroughly. By doing this, users can find out the manufacturer’s details, including a contact number or email address.
Manufacturers can repair the printer if there are some hardware issues. If the manual doesn’t contain the details of the manufacturer, then users can visit the website to raise their complaints.
If the warranty period is over, then no one can help, but if the users are lucky and the printer still lies under the warranty period, then ask the manufacturer to repair the printer (done at no cost). Repairing also involves the replacement of damaged parts.
Decisively, these are the methods through which users can resolve problems like “black ink is not working on HP printer”. The mentioned methods are straightforward and easy to perform. I hope this article favors the users.
FAQs
Ans: For this question, there could be different reasons like software problems, print head Problems, cartridge Problems, lower ink levels, alignment problems, long printing queues, and driver problems.
Ans: Users can clean or unblock the nozzle by automatic print head cleaning and manual print head cleaning. These are the two basic ways to unblock the nozzle. But if the nozzle is seriously cloaked, then clear the nozzle with isopropyl alcohol and then run through the clean cycle.
Ans: The reasons could be cloaked printhead and paper settings. Read above, about print head problems to know how to clear them. For paper settings, users are required to make sure that the paper size, layout, orientation, and other settings in the printer software are correct. If incorrect, change the settings accordingly. Also, check if the documents do not contain blank pages.
Ans: If the cartridge is damaged, users will encounter missing colors, streaky prints, smudges, and ink blotches while printing. If users come across these errors, then they are suggested to replace the cartridge with the new one.
Ans: Yes, users can just replace the blank ink cartridge without replacing all the cartridges at the same time, only if the ink levels are low. But remember, all the cartridges need to be installed in the printer.