Wondering why your artwork doesn’t look neat or appealing as it should be? Then, you might be skipping bleed in your printing work!
If you’re also thinking about what bleeding printing is, it’s an extra line of ? (0.125 inches) size of the document ahead of the trim line that will be cut off at the time of production.
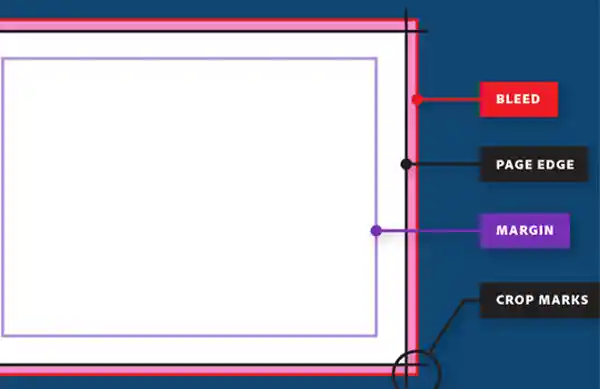
In bleed printing, the image is printed on oversized paper, then it is stretched to the bleed point so that while cutting the final image, the white outline or misalignment can be avoided.
Bleed printing is used mainly in books, magazines, brochures, pamphlets, posters, etc. While there are some projects that don’t require bleed-in print, like documents or presentations.
When the page is prepared to be printed, it must be printed with bleed marks to make sure the trimmed document will be the expected final size.
Why is Bleed in Printing Important?
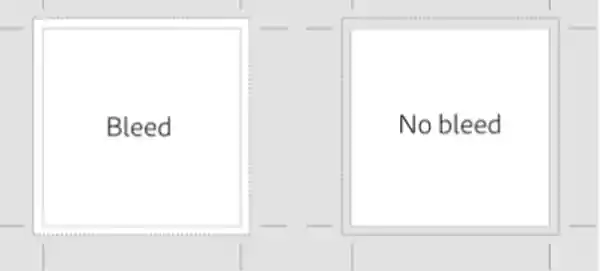
The first and most important reason why print bleed is vital for your artwork is to avoid white edges on the boundary of your page. The white edges on the page can make a design look poor-quality and unprofessional.
The ideal size for a full bleed printing is generally 0.125 inches or 3.0 mm. However, the artists or printers can choose whatever size they are comfortable with. Without adding bleed lines to your print, shows a lack of attention to detail in your artwork. Keeping in mind what type of paper, whether it’s photo paper or art paper you’re using, is also essential.
Though there are a number of prints like presentations or documents that don’t necessarily require a bleed line, if you’re making a pamphlet, brochure, or poster, then you might need a full-size bleed line to complete your work.
How to Add Bleed in Different Software?
Ways of bleed printing in various software can differ. Though the steps are easy to follow, you just need to keep your paper size in mind while bleeding the document. Read ahead to know how to print bleed in different software.
Add Bleed in Adobe Photoshop
If you are an Adobe Photoshop user, you must already know how fast and easy the process is going to be; this will need you to follow some quick steps.
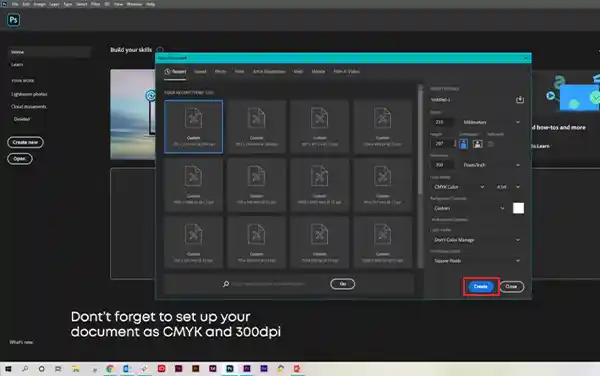
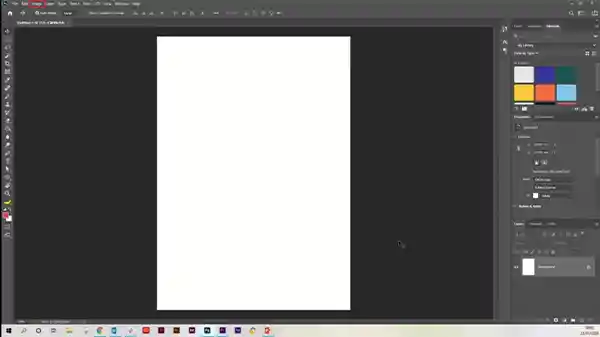
- Launch the Photoshop app.
- Select the Document you want to print bleed size.
- Select the Color mode of the document as CMYK, and set the resolution to 300.
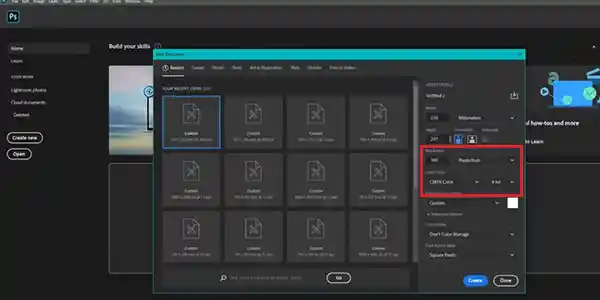
- Click on Create.
- Select View.

- Select Rulers. (Or you can press Ctrl+R).
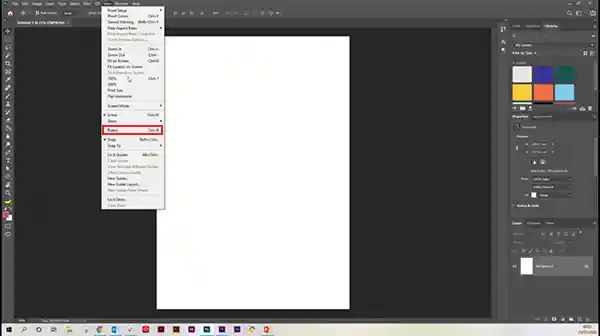
- Drag the lines horizontally and vertically at the corner of your paper.
- Now, go to Image.
- Select Canvas Size. (Or you can press Ctrl+Alt+C).
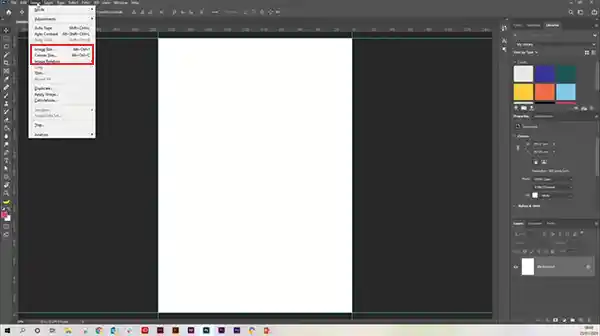
- Increase 6 mm or whatever size you wish to add on both height and width.
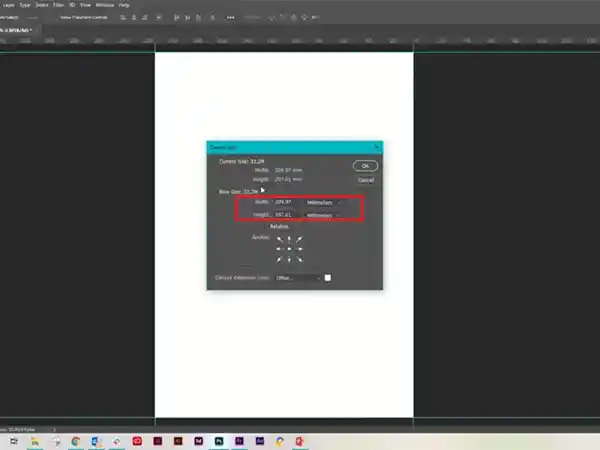
- Now, Press OK.
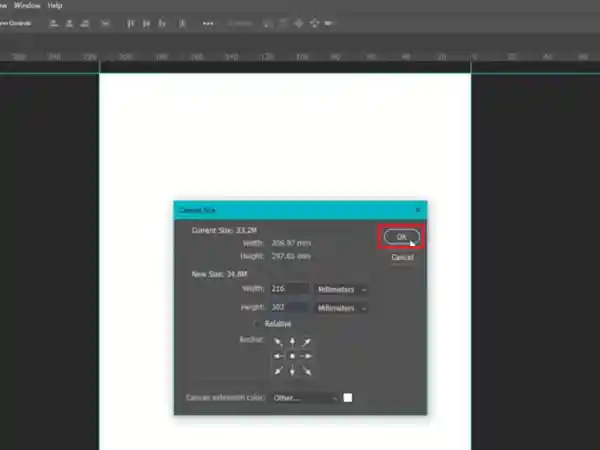
- You can now see your document having a full bleed and will be printing bleed size.
These were the steps to achieve a bleed line on your document using Photoshop; read further to know about Adobe Illustrator.
Add Bleed in Adobe Illustrator
- On Illustrator, open your Document.
- Go to File.

- Select Document Setup.
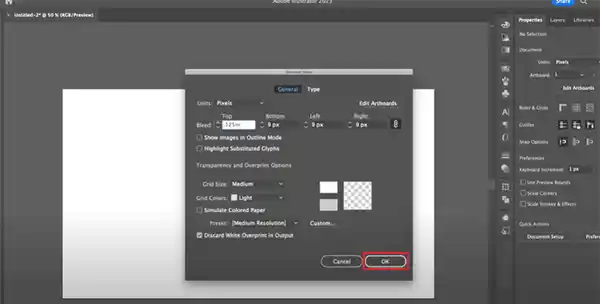
- Go to the bleed column.
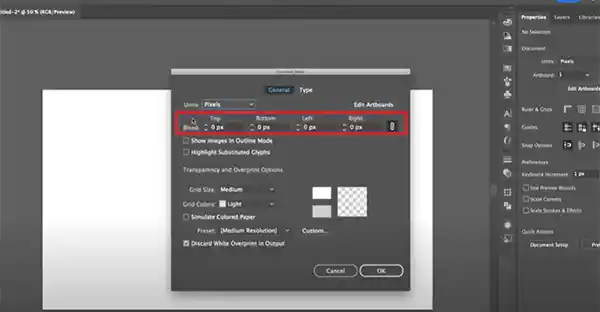
- Change bleed from 0px to .125in.
- Click OK.
- Now, go to File again.

- Select Save as

- Now, go to Format.
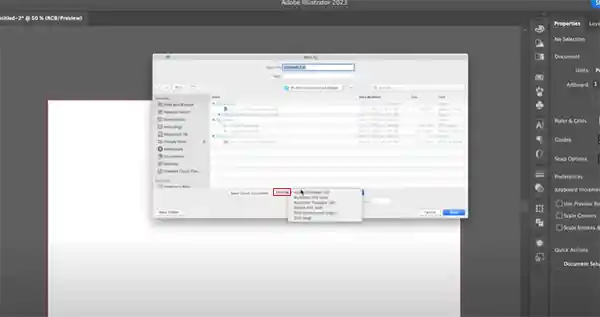
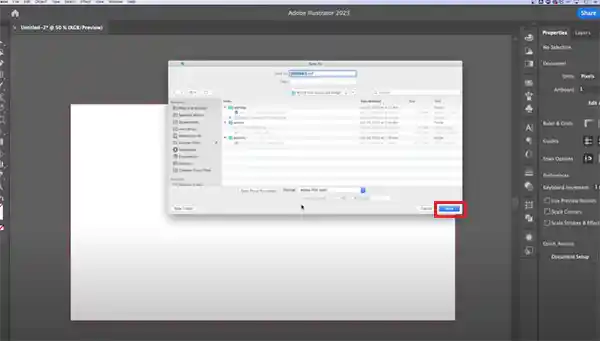
- Drag down the arrow and select Adobe PDF.
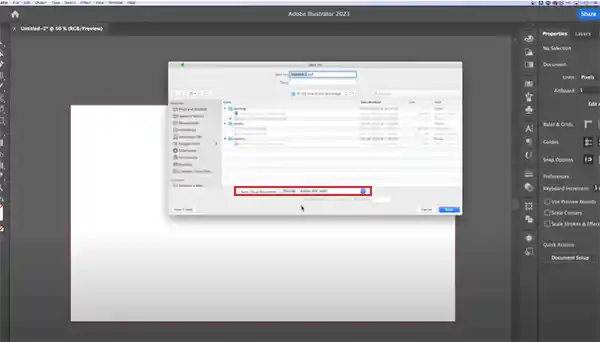
- Click on Save.
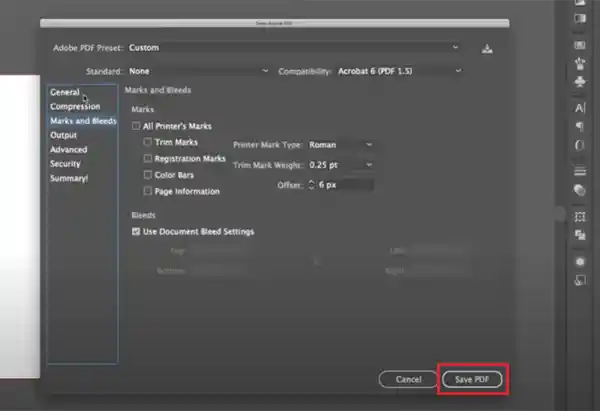
- Now, an Adobe PDF page will open, go to Marks and Bleeds.
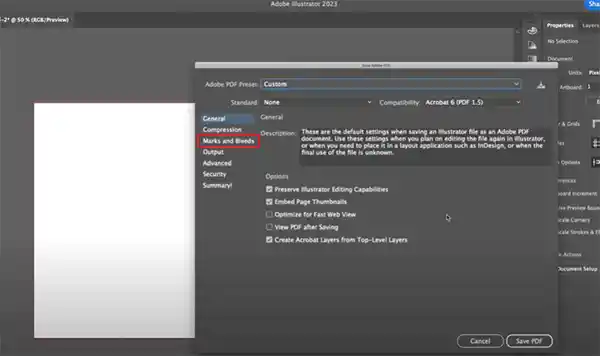
- Check if all the required columns are ticked.
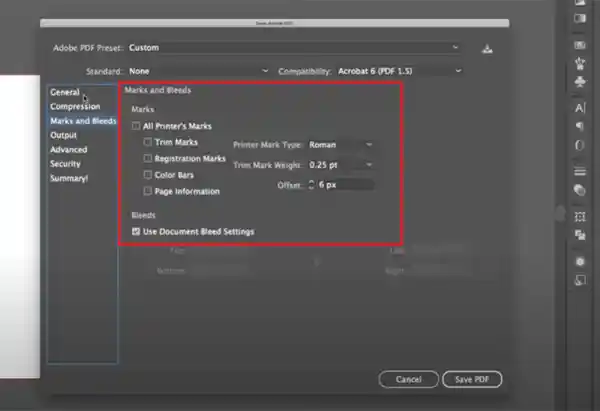
- Then, go back to General and click on Save PDF.
This is how you can add a bleed line using Adobe Illustrator. Read more to know about Adobe InDesign.
Add Bleed in Adobe InDesign
Indesign is a popular publishing and page layout designing Abode application. To bleed in print using InDesign, follow the steps.
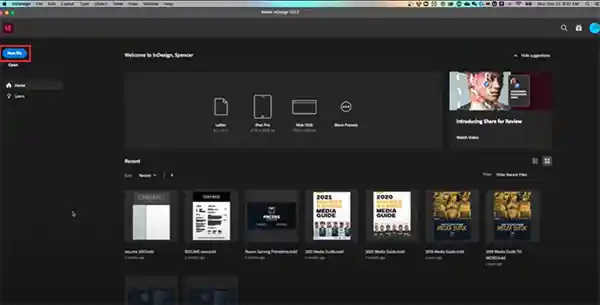
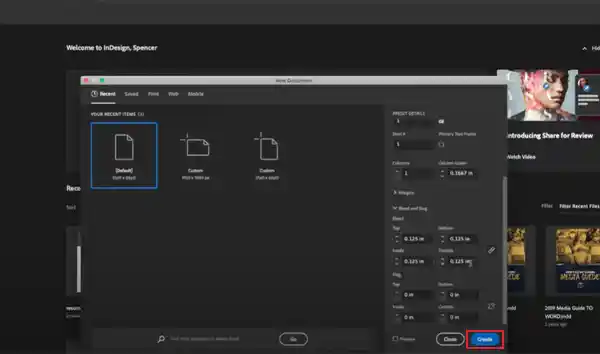
- Launch InDesign, and select a new file.
- Click on a document, and go to the Preset Details menu on the right of the screen.
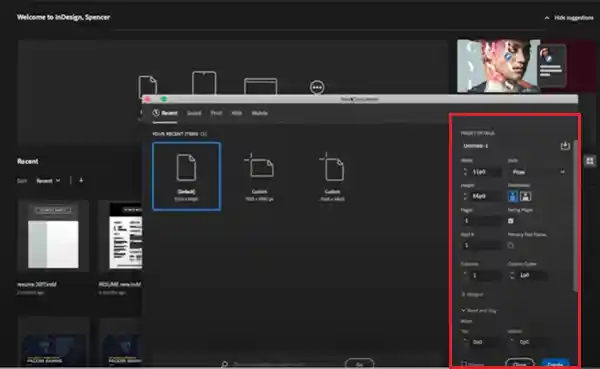
- First change the units in inches.

- Then, drag down the page and select the column Bleed and Slug.
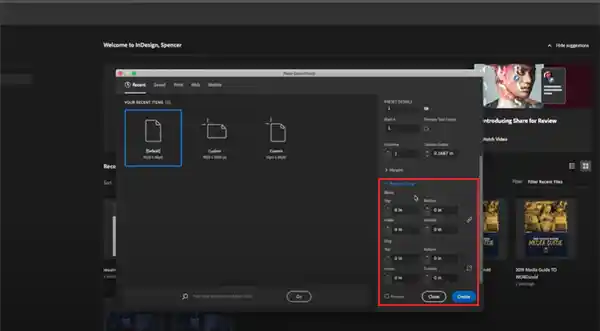
- On the Bleed column, change the top unit from 1 to .125in.

- Then click on the chain sign.

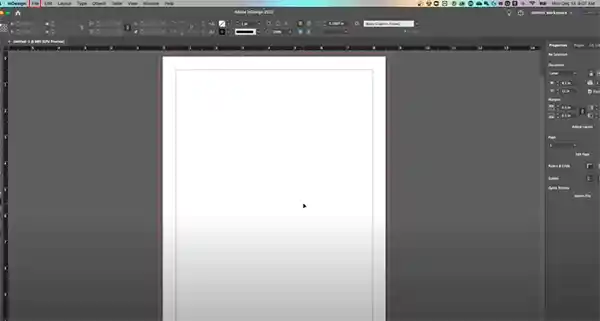
- Click on Create.
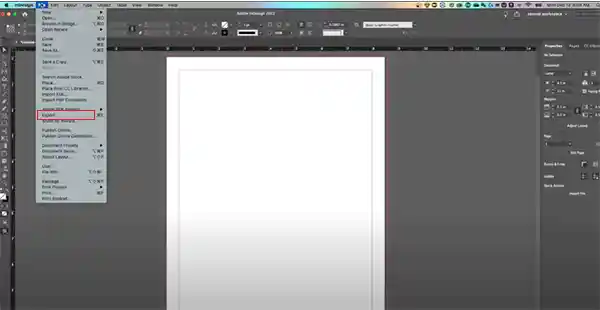
- Now, click on the File.
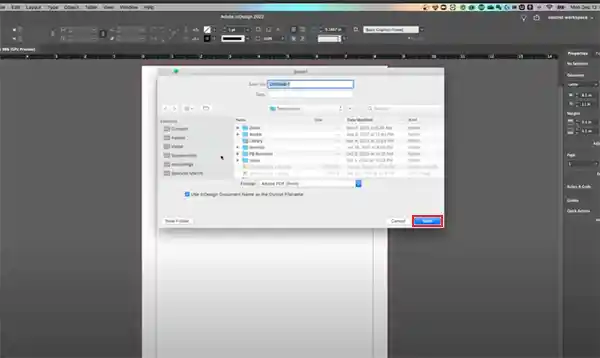
- Go to Export.
- Click on Save.
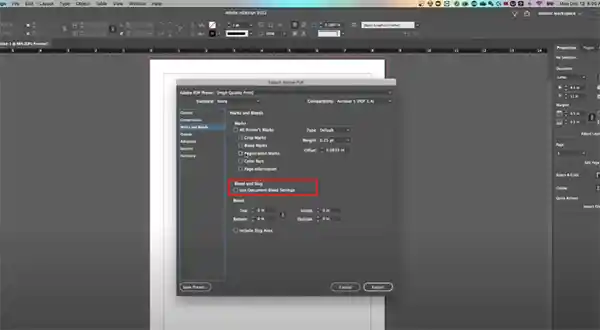
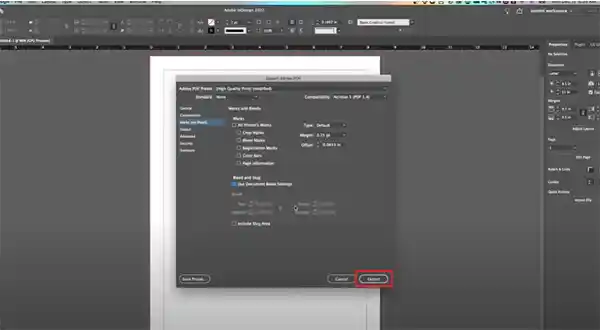
- Now, on the Adobe PDF page, go to Marks and Bleeds.
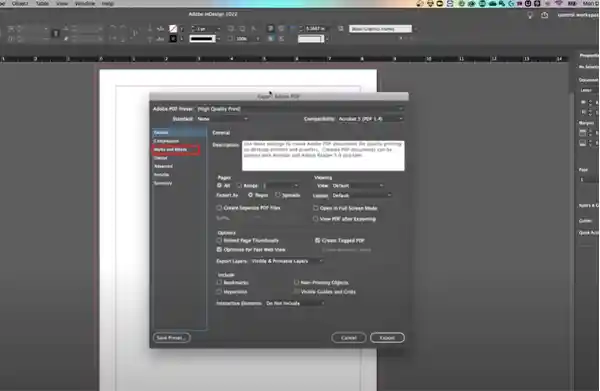
- Tick on the Use Document Bleed Settings checklist under bleed and slug.
- At last, click on Export.
After this, learn how to bleed print in Canva.
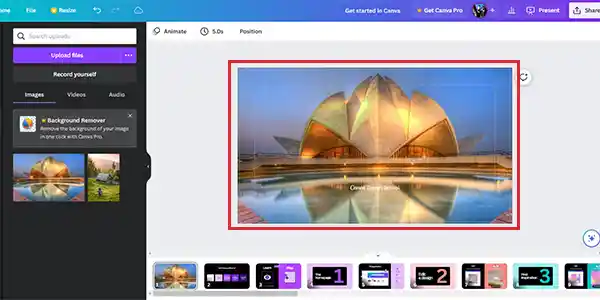
Add Bleed in Canva
Canva is one of the finest freely available editing tools in the market. It is not only free but also easy to use and provides a good quality product. Follow these easy steps to add a bleed line in Canva.
- Open Canva.
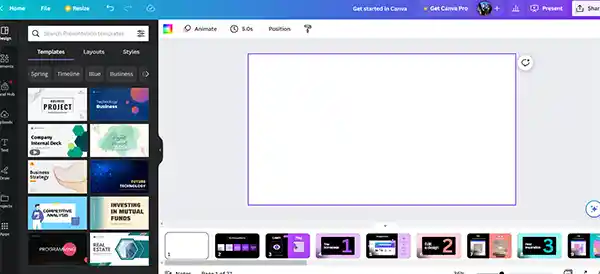
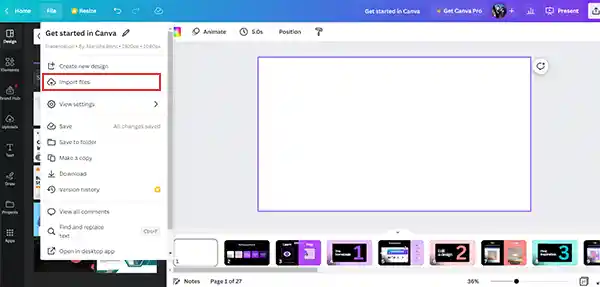
- Go to File.

- Click on Import File.
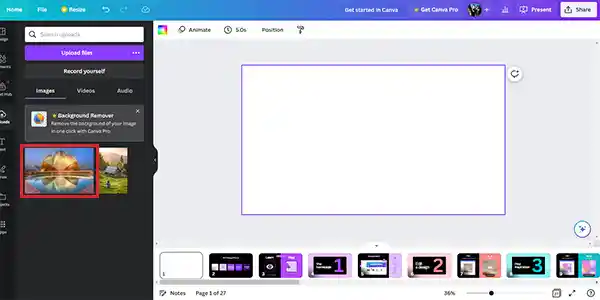
- Click on Choose File.

- Select your imported file.
- Go to File again.
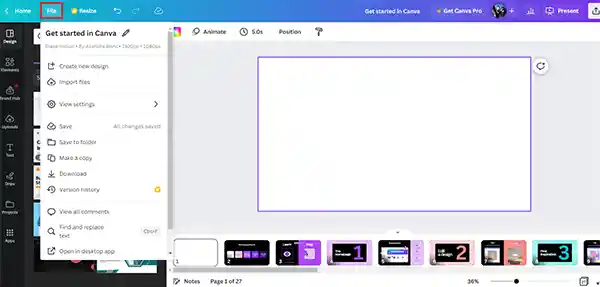
- Click on View Settings.
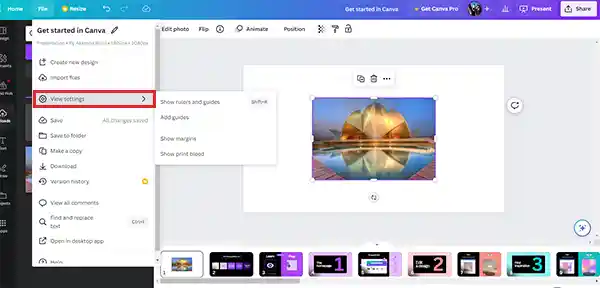
- Click to Show Print Bleed and Show Margins.

- This will create a Bleed line and margins around the file.
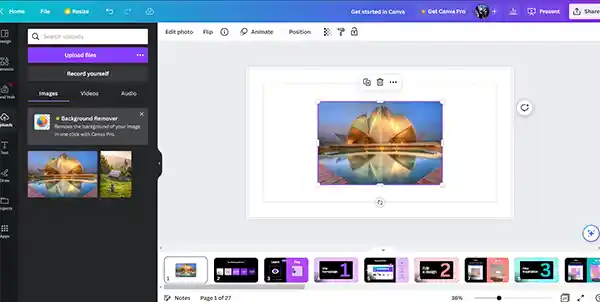
- Drag the File to the edges and make sure you don’t cut the required design.
- Now go to Share.

- Click on download.

Adding a bleed line is the easiest with Canva. Read ahead to know about Corel DRAW.
Add Bleed in Corel DRAW
Corel DRAW is a software program used for editing vector graphics, illusions, and designs, it is used generally by professionals. Let’s see the process of drawing the bleed lines using Corel DRAW.
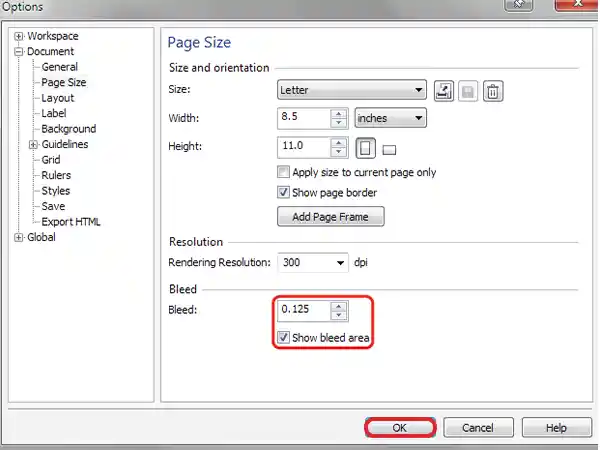
- Click on Layout.
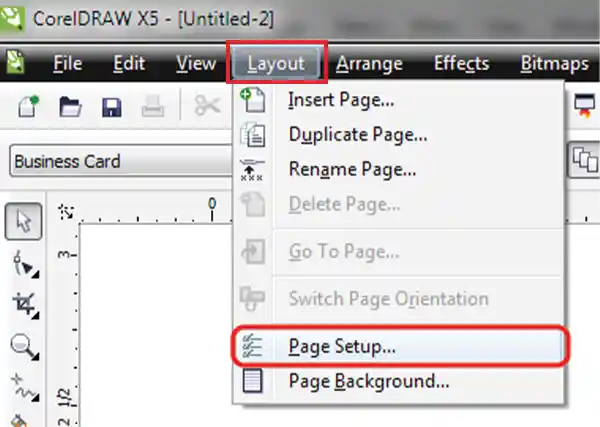
- Go to Page Setup.
- In the Bleed column, type 0.125 and tick to Show Bleed Area.
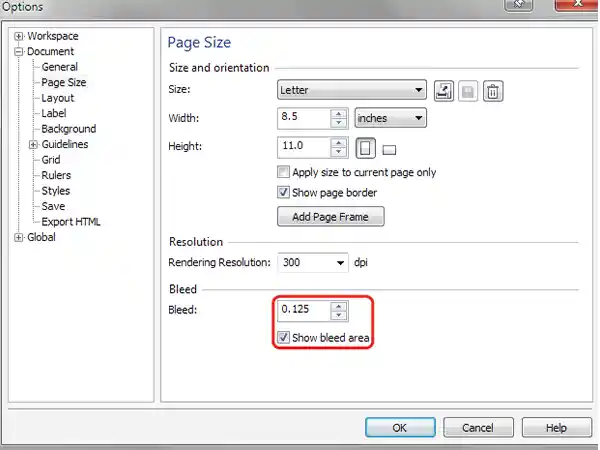
- Now click OK.
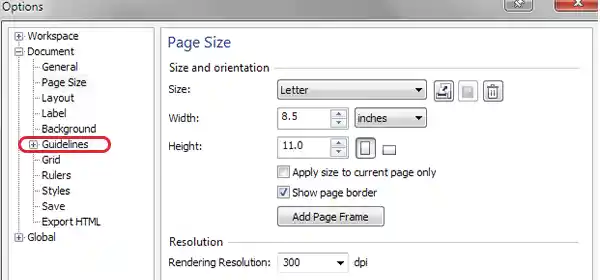
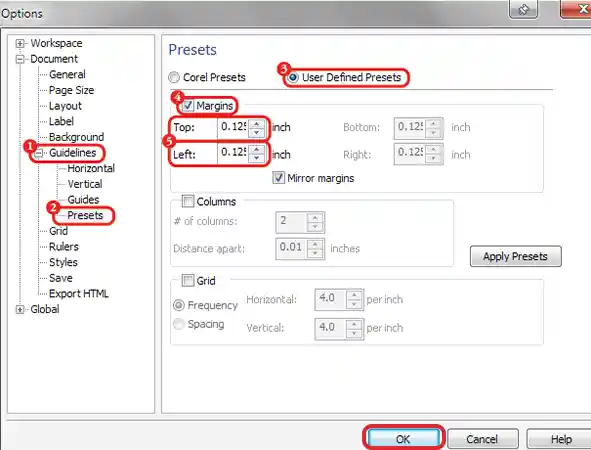
- Now, go again to Layout > Page Setup, and click on + sign before Guidelines.
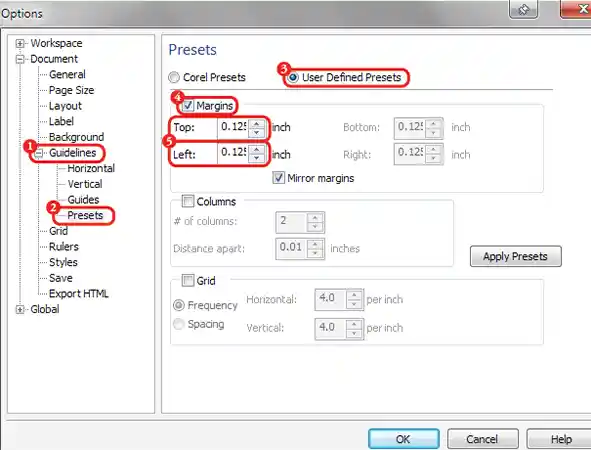
- Under the Preset page, click on the User Defined Presets circle.
- Now, on the same page, tick the Margins column.
- Now, on both the Top and Left column, type 0.125.
- Click OK.
- Once again, go to Layout > Page Setup, on the Rendering Solution box set DPI to 300.

Now, you can save bleed size for printing your document in any format you wish. And you can also go for different bleed sizes according to the size of your document. And if you’re confused about choosing the bleed size or any printing-related problems, you can always opt for online printing. FAQsWhat happens if you print without bleeding?If you don’t stretch your document to the edges of the paper, then the final print will come with white boundaries around the document. Can you print without bleed lines?Printing without bleed lines is possible and even used in specific types of work, like for documents or presentations, or projects.What does 3 mm bleed mean in printing?The standard size of a bleed line in any document is considered 3 mm. This will make the size of a document 6 mm longer (including the trim line). So, if a document is sized 106 mm X 156 mm, it will be cut down to 100 mm X 150 mm in the final process. Sources:Bleed (Printing), By WikipediaUsing margins, bleed, rulers, and crop marks, By CanvaCreate a bleed for your publication, By Microsoft